W/O Work Order Forms
This option is taken to print a range of work orders from the WORK ORDER files.
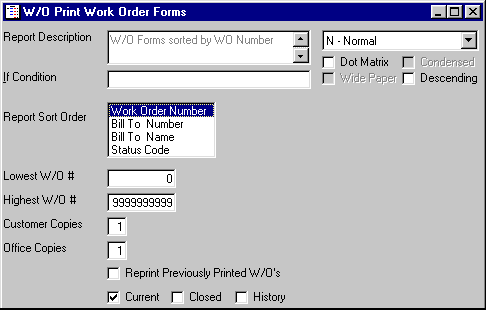
After selecting this option from the menu, the computer will display the W/O Work Order Forms screen as follows:
Enter the information on this screen as follows:
The Report Description will display for verification. The If Condition may usually be edited, if you wish to change certain conditions for the report. Reports may be printed Normally, Group and Grand Totals Only, or Grand Totals Only. If you have a Dot Matrix printer, you may then specify whether the report should print in Condensed mode, and may specify if your printer is using Wide Paper. You may also print the report in Descending (rather than ascending) order.
Select the Report Sort Order that you wish to see the work orders printed in. (Lowest and Highest ranges will change when you select different sort orders.)
You will then be allowed to specify a Lowest and Highest range for the report. This range will be based upon the sorting fields in the file.
Enter the number of Customer Copies and Office Copies that you wish to print for each work order.
If you check the Reprint Previously Printed W/O’s box, the computer will print work orders that have been previously printed.
If you check the Current box, the computer will include unposted (and partially posted) work orders that have NO actual completion date.
If you check the Closed box, the computer will include unposted (and partially posted) work orders that have an actual completion date.
If you check the History box, the computer will include fully posted work orders.
If you wish to print a sample work order form, click on the Sample Form icon on the Toolbar or press [Ctrl][O].
Review the data you have entered on the screen. If you wish to ACCEPT your responses and PRINT the invoices, click on the Accept icon on the Toolbar, pick the Accept option from the File Menu, or press [Ctrl][A]. If you wish to SAVE the defaults and PRINT the invoices, click on the Save icon on the Toolbar, pick the Save option from the File Menu, or press [Ctrl][S]. If you do NOT wish to print the information, click on the Cancel icon on the toolbar, pick the Cancel option from the File Menu, or press [Ctrl][L] and this system will exit this program.
After you have accepted (or saved) the information the computer will go through a posting procedure to make the work orders ready to print. You are now ready to select the Printer and print the work orders.
After the work orders have printed successfully, you should click on the Update Printed Flag icon on Toolbar or press [Ctrl][U].
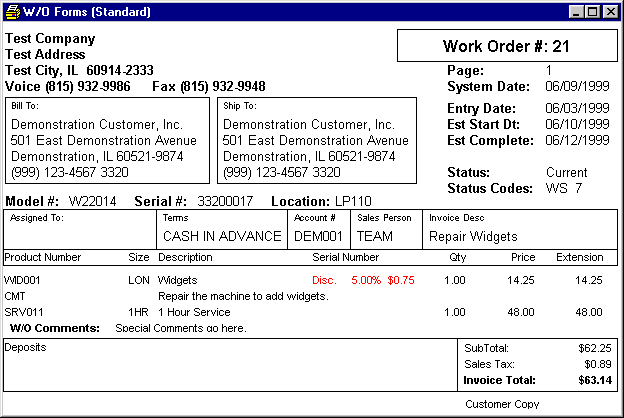
Here is a sample work order: