G/L Journal Entries Maintenance
This option is used to enter journal entries into the TEMPORARY JOURNAL ENTRIES file. Throughout the system and its modules, posting options write entries to the TEMPORARY JOURNAL ENTRIES file. This option is used to enter entries which did not originate from other modules.
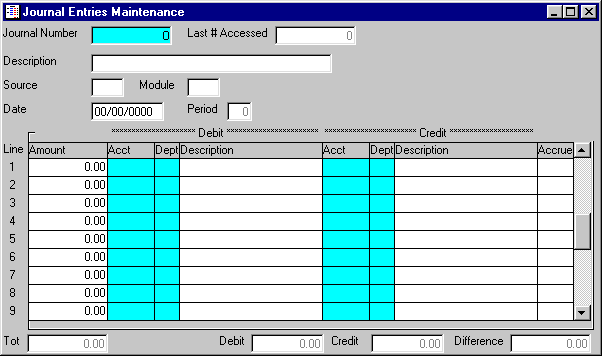
After selecting this option from the G/L Processing Menu, the screen will appear as follows:
A) To add a new journal entry, leave the Journal Number blank for the system to assign the next available journal number or enter an unused Journal Number.
B) To change an existing journal entry, enter the Journal Number of the journal entry you wish to change, or Perform A Search to find a temporary journal entry record. Upon entering a valid number, the remaining information will be displayed. Make changes in the same manner in which you entered the journal entry.
C) If you do not need this journal entry any longer, you may Delete this record (journal entry) from the TEMPORARY JOURNAL ENTRY file.
Enter the Description of the Journal Entry.
Enter the Source of the Journal Entry. This field can be used to identify from which particular journal an entry came (for example: JE = Journal Entries, ADJ = Adjusting Entries, DEP = Depreciation Entries, etc.), or perhaps the initials of the operator entering the entry.
Enter the Date of the journal entry.
Enter a detail line for each Product that you wish to appear on this invoice. Enter detail information as follows:
Enter the Product # that you wish to sell. If you wish to FIND the information, click on the Find icon on the Toolbar, pick the Find option from the Edit Menu, or press [Ctrl][F]. Upon entering a valid number, the computer will default the Description, PC (Price Code) from the customer file, and Price. If the product is an inventory item, the computer will display the quantity OnHand, quantity Allocated, and quantity Available for this product.
Enter detail information as follows:
Enter the Amount that you wish to disburse.
Enter the Acct (account) and Dept (department) that you wish to Debit, or Perform A Search to find an account record. Upon entering a valid number, the description will be displayed.
Enter the Acct (account) and Dept (department) that you wish to Credit, or Perform A Search to find an account record. Upon entering a valid number, the description will be displayed.
The Accrue flag may be selected if you want this amount to be accrued. You can toggle this field by hitting the [SPACE] bar or double-clicking this field with your mouse. Accrued amounts will be reversed and re-entered automatically into the next period during G/L Journal Entries Posting.
Review the data you have entered (or changed) on the screen. If you wish to SAVE the information, click on the Save button on the Toolbar, pick the Save option from the File Menu, or press [Ctrl][S]. If you do NOT wish to save the information, click on the Cancel button on the toolbar, pick the Cancel option from the File Menu, or press [Ctrl][L].