This option is taken to Print (or view on the screen) checks for the invoices you selected for payment (both manual and computer). Please note that the SYSTEM DATE will be the date printed on the checks.
Before printing checks, you should have printed a Pre-Check Verification Report. Please review the report verifying that you wish to print all the checks listed and that the "Net Amount Paid" is the correct check amount.
This option must be selected before you run the Check Posting so that the computer may assign check numbers to each invoice. As check numbers are assigned, the computer verifies that the new check numbers do not already exist in the CHECK RECONCILIATION MASTER file.
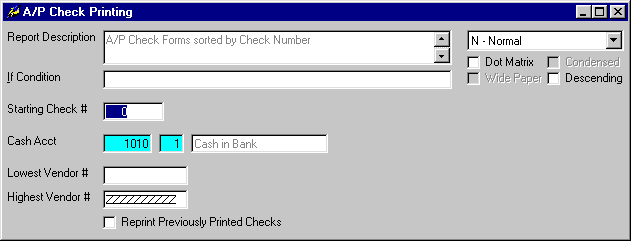
After selecting this option from the A/P Processing Menu, the computer will display the screen as follows:
NOTE: Donít forget to Insert and align check forms in the printer. (Refer to the Recommended Supplies list for the specifications of the type of check forms compatible with this program.)
Enter the Starting Check Number followed by the Cash Account for these checks. You may specify a range of Vendors. If you wish to Reprint Previously Printed Checks, you may check this option box.
If you wish to print dummy checks to determine if the checks are properly aligned in the printer, select the Dummy Form icon. A dummy check stub and check will then be printed using X's for data. You may print as many dummy checks as necessary. When you are ready to print the checks, click on the Accept icon on the Toolbar, pick the Accept option from the File Menu, or press [Ctrl][A]. If you do NOT wish to proceed, click on the Cancel icon on the toolbar, pick the Cancel option from the File Menu, or press [Ctrl][L].
NOTE: Donít forget to insert and align paper in the printer when you are done printing checks.