D/S Pre-Printed Invoices
This option is taken to Print A Report (or view on the screen) PRE-PRINTED INVOICES.
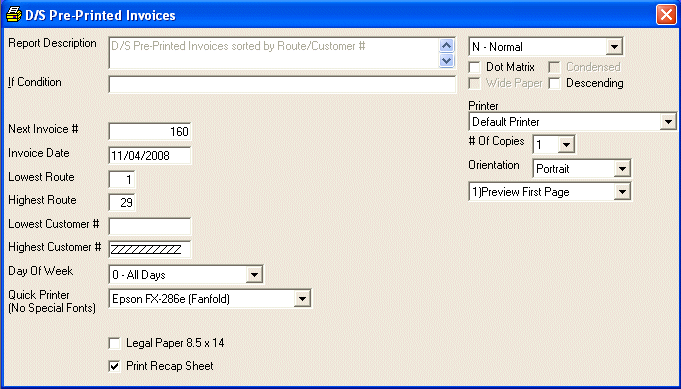
After selecting this option from the menu, the computer will display the D/S Pre-Printed Invoices screen as follows:

Enter the information on this screen as follows:
The Report Description will display for verification.
Enter the Next Invoice # to be assigned to the pre-printed invoices. The system will automatically maintain this invoice number.
Enter an Invoice Date for the invoices.
You will then be allowed to specify Route and Customer # ranges for the invoices.
Select a Day Of Week for the invoices.
If you want to use the quick printing feature, select a Quick Printer for the invoices.
If you have selected the Quick Printer option and you want to print the invoices on legal size instead of letter size, mark the Legal Paper 8.5 x 14 checkbox.
If you want to see a recap sheet for each route printed, mark the Print Recap Sheet checkbox.
If you wish to ACCEPT this information and proceed, click on the Accept icon on the Toolbar, pick the Accept option from the File Menu, or press [Ctrl][A]. If you do NOT wish to print this report, click on the Cancel icon on the toolbar, pick the Cancel option from the File Menu, or press [Ctrl][L].
After you have accepted the information, the computer will go through a posting procedure to make the invoice forms ready to print then you may follow the normal steps setup in the standard Print A Report section.
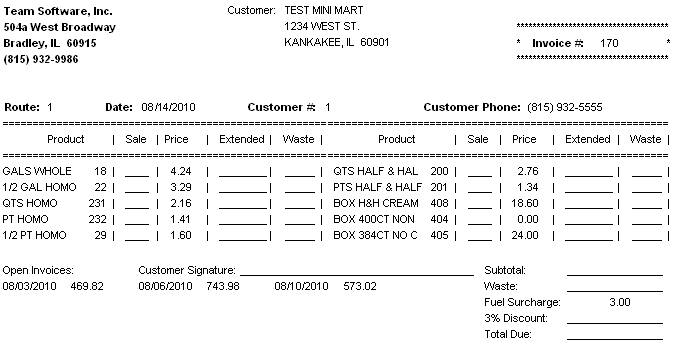
Here is a sample pre-printed invoice:

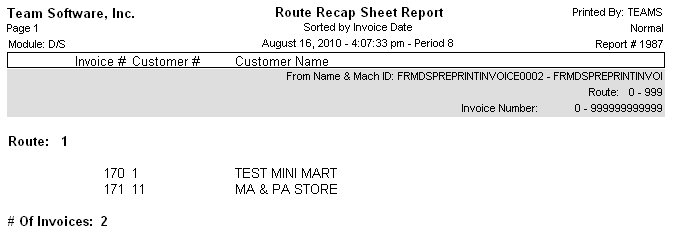
Here is a sample recap report:
