A/P Select/Deselect Invoices for Manual Checks
This option is used to assign manual check numbers to existing unpaid invoices in the OPEN PAYABLES file for which you have written (or intend to write) a manual check. It is very important to enter manual check numbers for invoices which you did not pay with computer printed checks to maintain the integrity and completeness of your Accounts Payable data.
The invoices for which you are assigning manual checks will be included on the next Check Register you print. In addition, all invoices which you assigned manual check numbers during invoice entry, using the Temporary Invoice Maintenance option on the A/P Processing Menu, will be included on the Check Register.
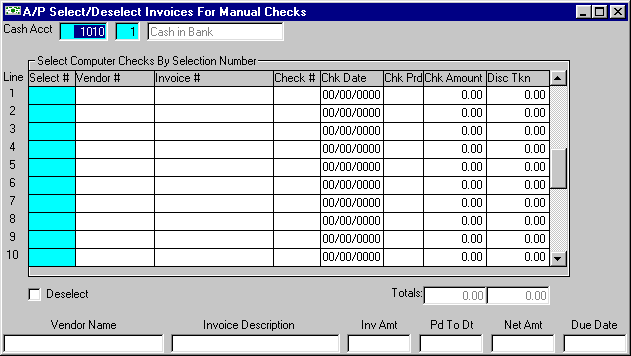
After selecting this option from the A/P Processing Menu, the computer will display the screen as follows:
If you wish to Deselect invoices, mark this option box.
NOTE: If you have previously printed a Check Register which includes invoices you are deselecting, you must print a new Check Register. Remember, you may not deselect invoices for which you have assigned computer check numbers. If you wish to return an invoice with a computer check number to unpaid status, use the Select/Deselect Invoices For Computer Checks option to remove the computer check number.
Enter the Selection # (number) you wish to select (or deselect). The Vendor #, Vendor Name, Invoice #, Invoice Description, Inv. Amt, Paid To Date, and Net Due will be displayed. The Check Amount (and, if applicable, Disc Taken) amounts need to be entered along with the Check # and Check Date (the Check Period will be displayed for verification).
NOTE: You may enter as many Selection Numbers as necessary. When you reach the last line on the screen, the top line will scroll off the screen and a new blank line will be displayed at the bottom.
Review the data you have entered on the screen. If you wish to proceed, click on the Accept icon on the Toolbar, pick the Accept option from the File Menu, or press [Ctrl][A]. If you do NOT wish to proceed, click on the Cancel icon on the toolbar, pick the Cancel option from the File Menu, or press [Ctrl][L].